In the Kardex Power Pick System there are settings called bindings. The basic idea is that since we support serial devices and only one computer can be connected to a serial device, we have a way to tell the Kardex Power Pick System which computer is “physically” attached to any given device and what devices or computer the device is attached to.
There are two types of bindings Physical and Logical:
- Physical Bindings tell the Kardex Power Pick System which computer should be communication with the device. Any other stations in the Kardex Power Pick System will communicate with the station that has physical bindings and it will be forwarded to the device.
- Logical Bindings can mean slightly different things depending if you are modifying a station or a peripheral.
- A logical binding for a station means that the station is allowed to drive the machine, it is recommended that any station with a logical binding is in view of the access opening it is bound to so that you do not try to drive when someone is in the opening.
- A logical binding on a peripheral tells the Kardex Power Pick System what machine(s) the device is used for. A couple examples would be a laser pointer only gets bound to the machine it is installed in because it is the only machine that it would be helpful on, a printer might be centrally located around a number of machines and do the printing for all of them.
All devices must have one physical binding to be usable, no device can have more than one physical. If you need to change the physical binding you first need to un-bind from the current physical and then you can bind the new one. There is no easy way to find the physical binding for storage unit, you will have to look through all the stations to find the right one.
For peripherals you can look at the peripheral bindings to find and change the station with physical bindings. There is no limit to the number of Logical bindings.
Setup Station Bindings
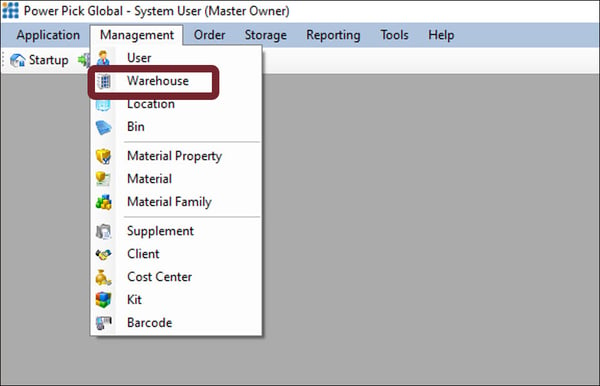
- Once you have opened the Kardex Power Pick System, in the top left corner, select “Management” and then select “Warehouse”.
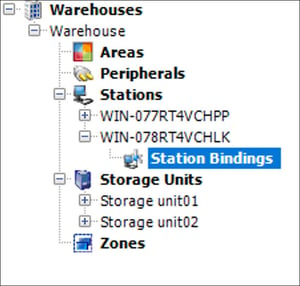
- On the left-hand side, expand the Warehouse you are working in, and then under Stations expand the station name you would like to modify and select Station Bindings
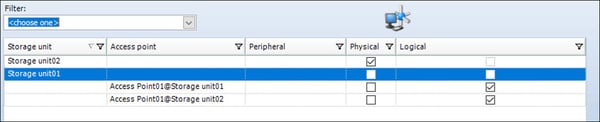
- Select the Physical binding for the station that will control the Storage Unit and logically bind the Access Points to the Stations that will have access to the machine.
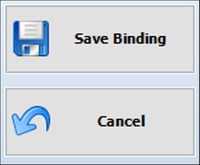
- Finally, save these bindings with the “Save Bindings” option to the right of the screen.
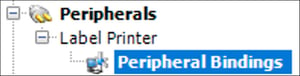
Setup Peripheral Bindings
- Once you have opened the Kardex Power Pick System, in the top left corner, select “Management” and then select “Warehouse”.
- On the left-hand side, expand the Warehouse you are working in, and then under Peripherals expand the peripheral you would like to modify and select Peripheral Bindings
- Select the Physical binding for the station that will control the peripheral and logically bind to the Access Points that the peripheral will be used for.
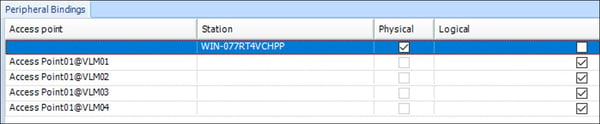
- Finally, save these bindings with the “Save Bindings” option to the right of the screen.
Download these directions in PDF here.
Need additional help? Contact us.