In the Kardex Power Pick System, the inventory SKUs are referred to as materials. The Kardex Power Pick System allows you to import materials which is helpful when you need to create several new inventory SKUs (maybe you’ve added a new product line) or at startup when loading your inventory. Whatever the case, the process is the same.
First, add your materials to a .csv file, using whichever format and information you would like the Kardex Power Pick System to hold on these parts. i.e., Material name, description, unit of measure, material property information, information on storing the part (Storage Rules). All available fields for this type of import can be found in the configuration window for building a pattern after the profile has been created.
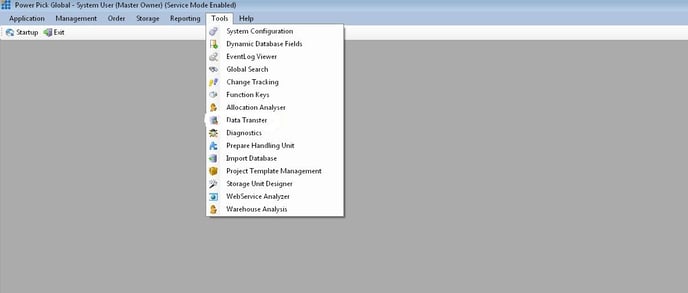
When the .cvs is ready, in the Kardex Power Pick System navigate to “data transfer” found under the tool tab.
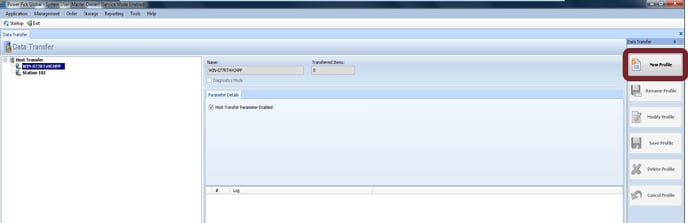
After opening the data transfer banner, create a new profile (make sure you are logged in on the computer that you want the profile to be saved on). Click “New Profile” on the right.
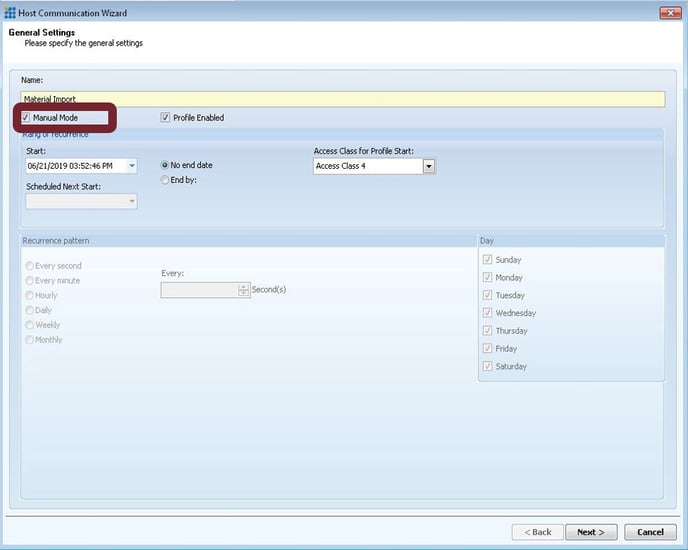
Create your new profile by giving it a name and selecting the options that best align with how you want the profile to run. Leave manual mode checked if you wish to have users manually start this profile when there is data to upload, likewise leave unchecked and setup a reoccurrence pattern if you want the Kardex Power Pick System to occasionally look for available data to upload without user prompt.
Select the service that you want the profile built for, in this case (Material Service). Information on the different service options is available in the GP.CrossEnterpriseUnit.Handbook of whichever version of the software you are using.

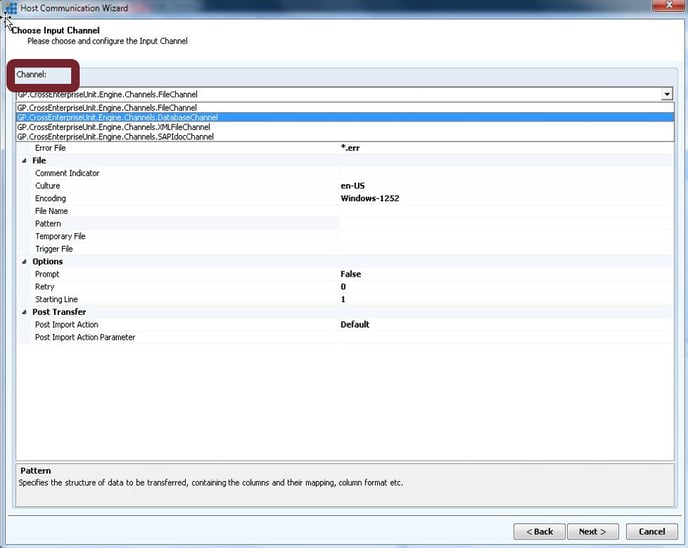
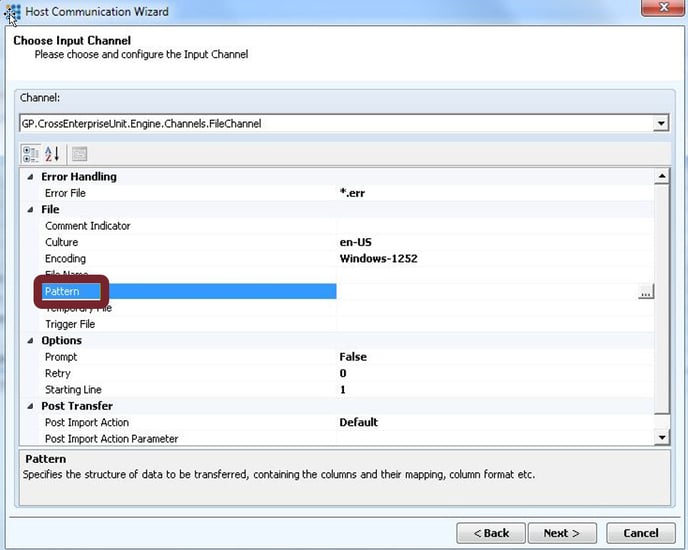
Select a channel: This determines the data path for accessing the file to import. In this case “GP.CrossEnterpriseUnit.Engine.Channels.FileChannel” is the correct channel. Information on each channel can be found in the GP.CrossEnterpriseUnit.Handbook of whichever version of the software you are using.
Create the Pattern: This determines the order in which the columns in the database will be read and imported. In your .csv file there are only two columns; MaterialName and Info1, separated by a comma “,”. The comma is important because it determines where the data in each column ends.
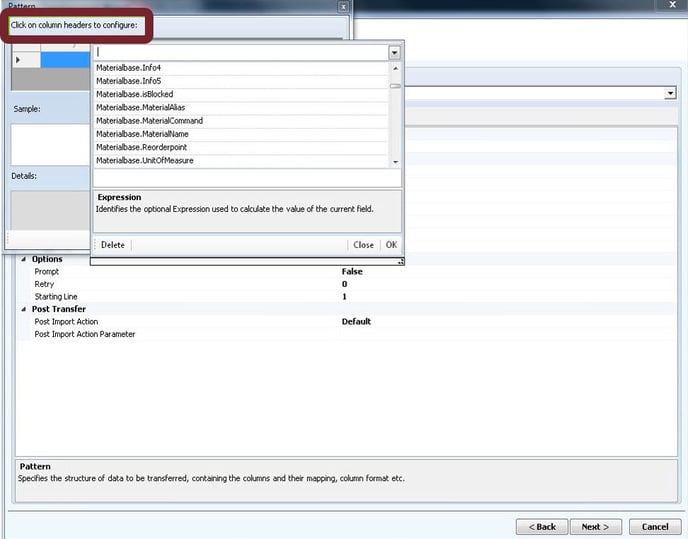
Select the columns from the dropdown options that corresponds with the data on your csv file. The columns in the profile maps where each column on your csv will go in the Kardex Power Pick System.
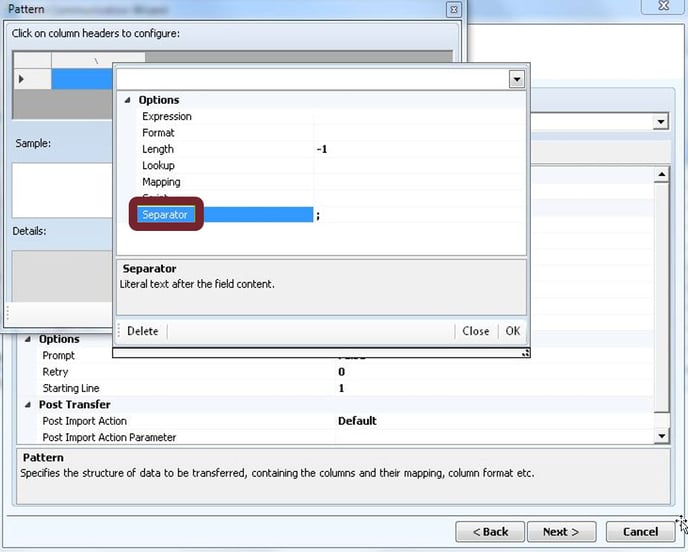
Change the separator to a comma for the Materialbase.materialName column, and on the info1 column leave the separator section empty.
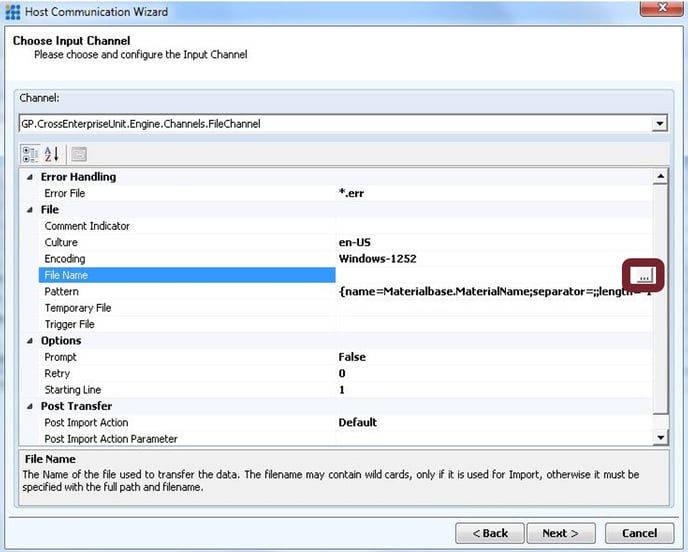
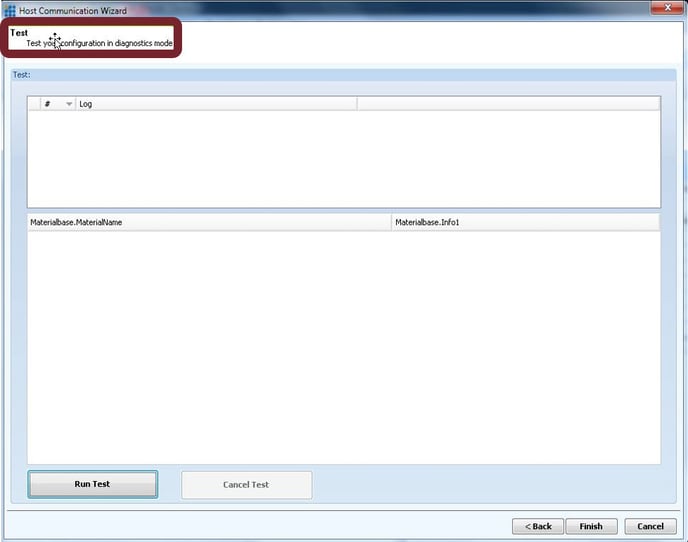
Navigate to the location of the file to import by clicking the button with the three dots on the right of the page across from File Name. After adding the path navigate to the next page for testing.
Test to ensure the file is being imported properly.
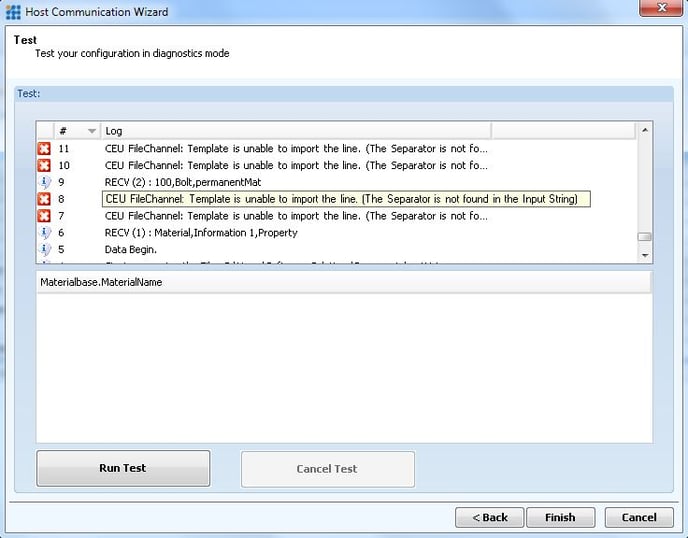
A test will provide errors if there are issues with the transfer so that you can diagnose before pulling that data into your system. In the example below, the test produced errors stating that it cannot import the line because the separator in my csv file does not match the separator in my profile pattern. To correct this, we have to double check that all our separators match. In this case the separator on my csv file was “,” while the separator on my pattern was “;”. Once I changed all the separators to be the same thing it works as expected.
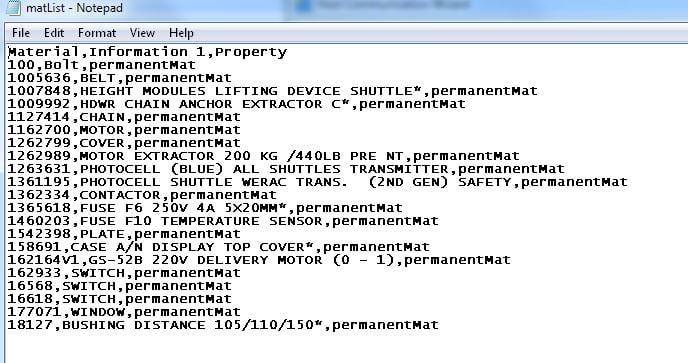
List of Materials to import. Note that each bit of information (column) is separated by a comma. This comma is what tells the Kardex Power Pick System where the information for each column begins and ends.
Failed import because the separator in the profile did not match with that of the csv. The separator that was used can be seen in the section above that spoke about changing separator. I did not change mine to a comma because I wanted to produce this error as an example.
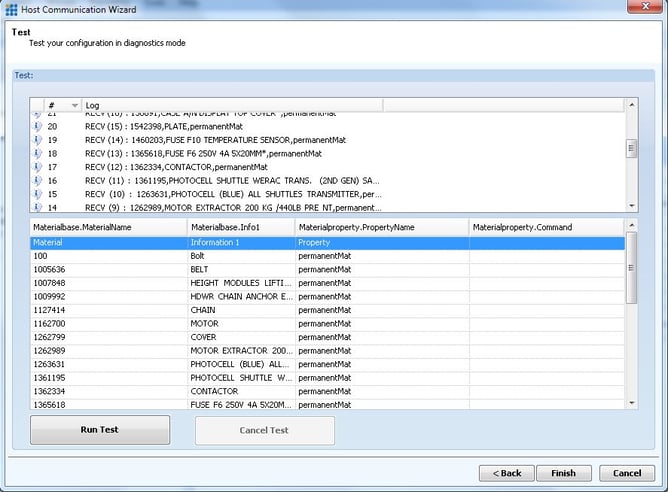
Once the separator is changed to a comma, and we rerun the test all the data that we have on our cvs will be imported without errors. This does not upload the information to the Kardex Power Pick System, as it is just a test to ensure everything matches.
To proceed with the upload, hit the finish button and to the right side of your screen there will be a button labeled “start profile” that will begin uploading data to the Kardex Power Pick System was pressed.

Download these directions in PDF here.
Need additional help? Contact us.